Field note 002 · October 6, 2026
The bakeware fit matrix
A pan belongs to a system. Measure the oven, rack, cooling space, sink, dishwasher and cabinet before comparing materials, coatings or set counts.
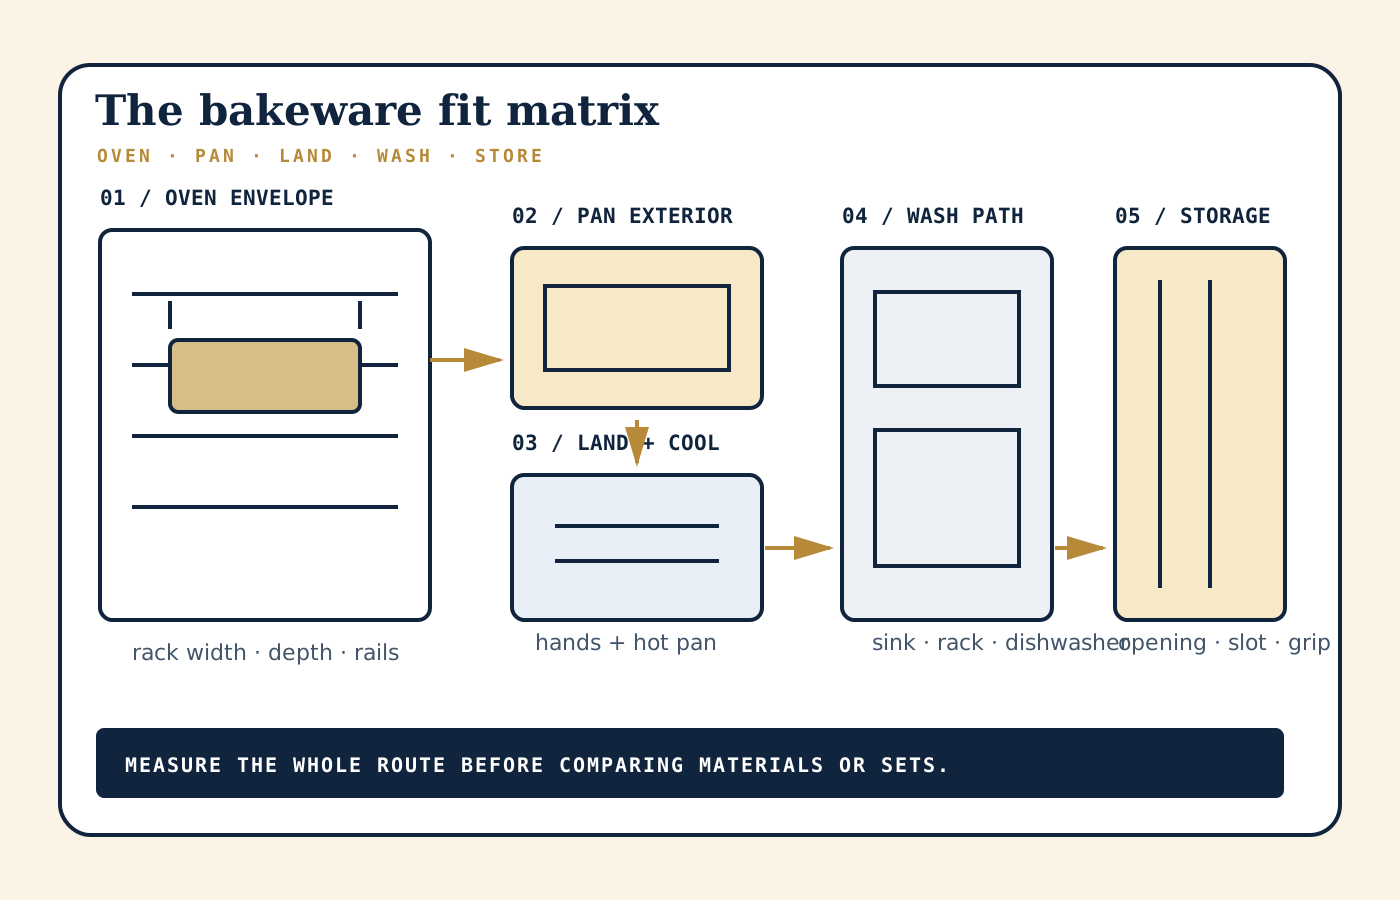
A baking sheet can fit inside the oven and still fail the kitchen. It catches on the rack rails. Two pans do not leave the spacing the oven manual requires. The largest piece cannot lie flat in the sink, clear the dishwasher spray arm or pass through the cabinet opening. A bundled rack fits the pan but has nowhere to cool.
Questions like these become more urgent during fall and holiday baking, when several pans, hot trays and cooling racks move through the kitchen at once. Recent public discussions about pan sizes repeatedly expose the same gap: a nominal size is treated as proof of compatibility. It is not. Measure the entire route and save the result as a kitchen record.
Use the current instructions for the exact oven, range and dishwasher. Record allowed rack positions, clearances, broiler guidance, cookware restrictions, cleaning limits and load directions. Never defeat a rack stop, force a door closed, cover a vent or use a pan arrangement the manufacturer does not support.
Measure six envelopes
1. The usable oven-rack rectangle
Measure the flat support area of the rack, not the widest interior wall. Record width between any raised side rails, front-to-back support depth and the point where a pan would interfere with the door. Photograph the rack position and model label. Oven cavities and rack geometry vary, including between appliances with similar exterior widths.
Check the manual for required space around pans and for rules about rack position. The goal is not to fill every available inch. Air movement, heat source, pan color, pan material and rack placement affect results; the appliance maker’s instructions and the recipe govern the setup.
2. The pan’s true exterior
Product names such as half sheet, quarter sheet, jelly-roll pan and cookie sheet do not replace dimensions. Record the maximum outside width and length, including rolled rims, handles and projecting grips. Record rim height, interior flat area and any lid or rack that changes the stack. For a set, measure every piece rather than multiplying the listed dimension of the largest.
3. The handling envelope
Add room for two protected hands, an unobstructed pull path and a stable landing area. A pan that technically clears the oven wall may still be hard to grip without brushing a hot rack or door. Mark where the oven mitts will be before opening the door and where the pan will land immediately afterward.
4. The cooling footprint
A cooling rack can be wider than its matching pan or have feet that require a stable surface. Measure the combined outside dimensions and the space needed between hot pieces. Keep paper, towels, packaging and other combustible items away from the cooking area. The U.S. Fire Administration identifies unattended equipment as the leading ignition factor in nonconfined home cooking fires, so layout should support staying present and attentive.
5. The wash route
Measure the sink basin at its narrowest useful points and note the faucet path. If a dishwasher is planned, measure the usable rack zone only as the manual directs; check spray-arm, detergent-door and neighboring-item clearance. “Dishwasher safe” describes care permission, not physical fit. Confirm whether the pan maker permits dishwasher cleaning and whether the finish or coating has special detergent, temperature or utensil limits.
6. The storage opening
Measure the cabinet or drawer opening before the interior. Hinges, face frames, door hardware and pullouts can make a large cavity difficult to enter. For vertical storage, add the divider thickness and enough finger room to lift one piece without unloading the whole stack. For horizontal storage, test the weight and reach of the complete stack.
Build a compatibility matrix before a set
A coordinated bakeware set should be evaluated as individual working pieces. Use one row per pan, rack, lid or liner. Copy materials, temperature limits, coating care and cleaning instructions from current maker documentation. Leave a cell unresolved instead of assuming compatibility.
| Field | Record | Pass question |
|---|---|---|
| Exterior | Maximum width, length, rim and handles | Does it sit fully supported without touching the door? |
| Operating fit | Allowed rack position and maker clearance | Does the planned arrangement follow the oven manual? |
| Accessory fit | Rack, lid, liner and thermometer geometry | Are the parts approved and stable together? |
| Care | Hand-wash or dishwasher directions; utensil limits | Can this kitchen follow the instructions every time? |
| Landing | Heat-safe counter and cooling footprint | Can a hot pan land immediately without crossing water? |
| Storage | Opening, slot, weight and reach | Can one item be removed without an unstable stack? |
Also record the return window, warranty source, replacement-rack or lid availability and the date specifications were checked. Dimensions can change between product revisions. A retailer photograph is not a measurement record.
Plan the working workflow
Stage before preheating
Clear the landing and cooling zones, set out dry oven mitts and confirm that no pan or unrelated object is stored inside the oven. If a lower drawer is present, consult the appliance manual to learn whether it is a broiler, warming drawer or storage drawer. Do not infer its purpose from appearance.
The U.S. Fire Administration advises keeping combustible items away from cooking areas and remaining in the kitchen while frying, boiling, grilling or broiling. For baking and roasting, stay nearby, use a timer and check the food regularly. The layout should make attention easier: timer audible, sightline clear and hot landing space ready.
Verify heat separately from doneness
USDA FSIS explains that an oven thermometer measures oven air and can verify whether the appliance reaches the intended setting. A food thermometer measures the food. One does not replace the other. Follow the recipe and current USDA guidance for the food being prepared, and use the thermometer type and placement intended for that task.
If an oven repeatedly fails to maintain its setting, follow the manufacturer’s service process rather than treating a large offset as a permanent recipe adjustment. Do not block vents or pack the cavity to compensate for uneven results.
Keep the handoff short
During a busy bake, every hot item needs a destination. Use a simple sequence: oven → landing → cooling → portioning → wash → dry → storage. Do not place the cooling rack where it blocks the sink, dishwasher, refrigerator or primary walkway. If the same counter serves several roles, finish one hot transfer before starting the next.
Test cleanup before committing
Place a cardboard template in the sink and dishwasher while both are cool and empty. Check whether it can be turned, rinsed and drained without striking the faucet or nearby dishes. If hand washing is required, decide where the large wet pan will dry without balancing over a burner, open drawer or narrow ledge.
Set-building rule
Buy the route, not the piece count
A useful group may be two compatible pans and one rack. A larger boxed set can create duplicate shapes, incompatible lids and a storage problem. Count the tasks you repeat, then choose the smallest set of pieces that passes the full fit matrix.
Run a twenty-minute cardboard audit
- Record the appliance models. Find the oven and dishwasher model numbers and download their current manuals.
- Measure the rack. Capture usable width, support depth, rails, stops, door path and planned rack position.
- Cut the largest template. Use the advertised maximum exterior dimensions, then mark handles, rims and the two-hand grip area.
- Rehearse cold. Move the template from storage to counter, oven, landing, cooling zone, sink, dishwasher and back to storage.
- Add the second pan. Test the real arrangement without assuming two smaller nominal sizes fit side by side.
- Check the manuals. Resolve rack placement, clearance, broiler, dishwasher and care questions with current instructions.
- Write the matrix. Save measurements, source URLs, return terms and the specification-check date.
A standard for future listings
Ultimate Kitchen Supply remains a planning preview. Prices, checkout, inventory, branded listings and availability are disabled until supplier authorization and accurate commercial terms are documented. Any future bakeware listing should state maximum exterior dimensions, interior dimensions, rim and handle geometry, weight, material and finish, maker temperature limit, compatible accessories, care method, warranty source, replacement-part path and packaging contents.
Compatibility claims should identify the exact appliance or measured constraint they rely on. “Fits standard ovens” and “dishwasher safe” are not enough to plan a kitchen. A good listing lets the buyer fill the matrix before ordering.
Sources
Reviewed October 6, 2026. Appliance and bakeware manufacturer instructions govern the exact products.