Field note 005 · October 27, 2026
The coffee station fit plan
A machine can fit the counter and still fail the first time you lift the water tank, open the bean hopper, swing the steam wand or remove the drip tray. Measure the working station, not the closed appliance.
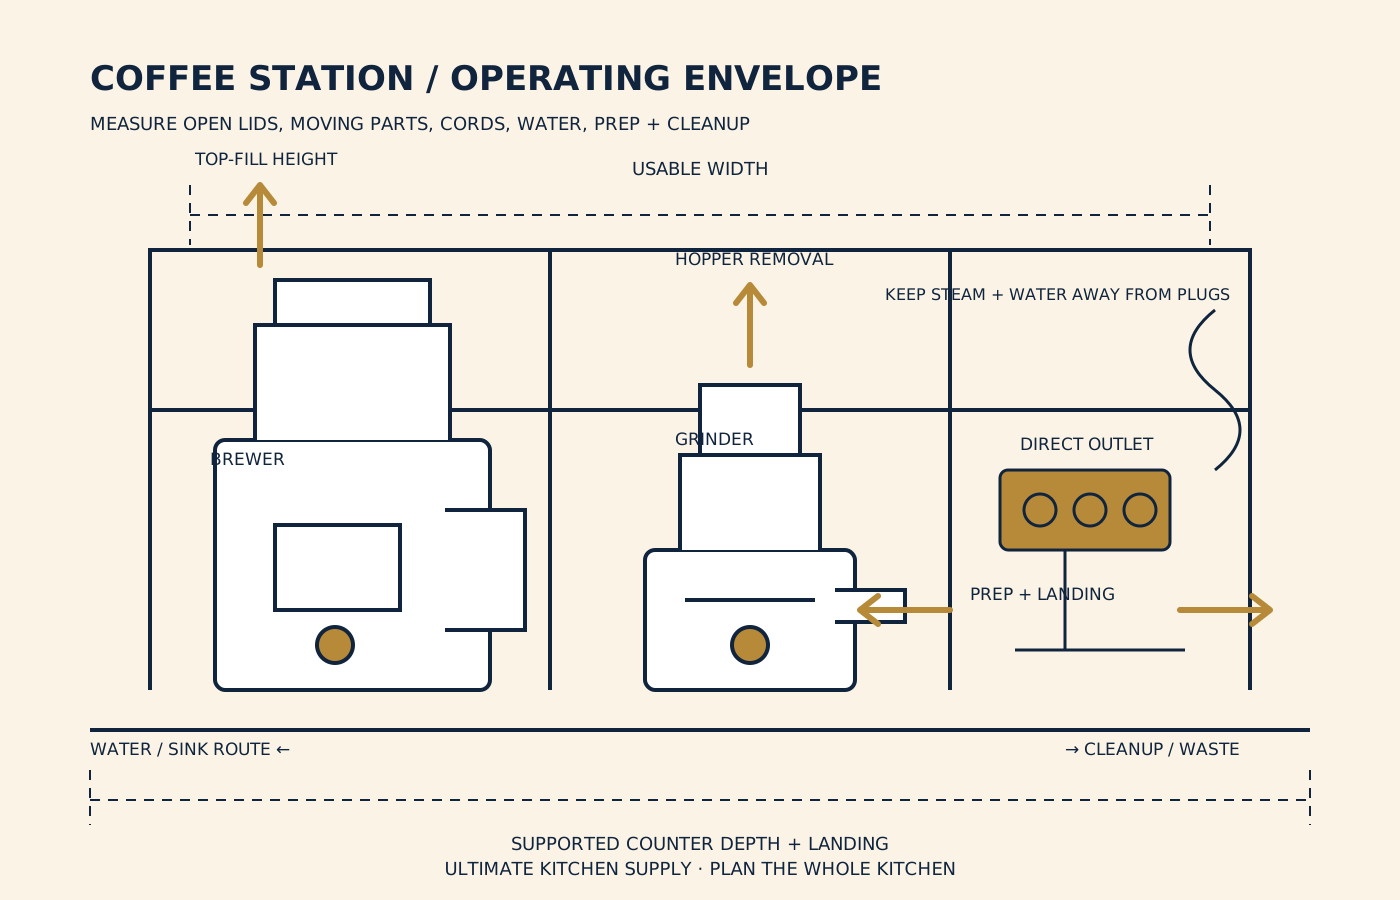
“Will it fit?” is the wrong first question for a coffee maker or espresso machine. The useful question is whether the complete setup works when every lid, hopper, tank, tray, handle and wand is moving—and whether the person using it can add water, weigh coffee, brew, serve and clean without dragging hot equipment across the counter.
Current public coffee discussions repeatedly surface the same misses: a top-loading tank trapped under a wall cabinet, a grinder hopper that cannot be removed, a steam wand crowded against a sidewall, a cord that reaches only through a power strip, and a beautiful narrow cart that moves under the filled machine. A measured operating envelope catches those problems before the return window closes.
This guide organizes fit and workflow. Use the installation, electrical, ventilation, filling, descaling and cleaning instructions for every exact appliance. Do not defeat a grounded plug, alter a cord, block vents, operate an appliance inside a closed cabinet, or assume a generic clearance is safe.
Measure the station in six layers
1. Draw the available envelope
Measure the counter or cart at its narrowest usable width and depth. Record the height from the work surface to the lowest cabinet, shelf, light rail or door mechanism above it. Mark backsplash projections, window trim, outlets, switches and anything that reduces the rectangle. If the station has doors, measure the opening with hinges and handles in their real positions.
Usable depth ends before an appliance blocks a wall outlet, pinches its cord, overhangs the front edge or interferes with a cabinet door below. Keep a landing area for a full carafe or cup. For a freestanding cart, record the top dimensions, manufacturer load rating, wheel-lock instructions and the path between the station and sink. A heavy machine on a light, flexible surface has not passed.
2. Build the brewer’s operating envelope
Published product dimensions often describe the appliance closed. Measure or verify maximum width, depth and height in every task position. Add the open water-tank lid or full tank-removal path, open brew basket, raised lever, cup platform, portafilter handle, steam-wand sweep and drip-tray removal. Include the cord exit and the manufacturer’s required rear, side and top clearance.
For a drip brewer, rehearse adding water and grounds without pouring beneath a cabinet edge. For a capsule machine, include the lever and used-capsule bin. For an espresso machine, map the portafilter’s insertion arc, scale and cup height, steam-wand range, knock-box position and the protected hand path around hot surfaces. If the appliance must slide forward, verify that the manual permits it and that the movement does not strain the cord, spill a tank or tip the machine.
3. Measure the grinder as a working tool
A grinder’s closed height does not show the space needed to remove its hopper or lid. Record the hopper-fill height, grounds-bin or portafilter clearance, adjustment-ring access and the direction grounds leave the chute. Leave room to brush retained grounds without pushing debris into an outlet or appliance vent.
Place the grinder on the side that supports a simple sequence for the primary user: beans, dose, brew, then serve. A right-to-left layout can be just as good as left-to-right. The goal is fewer crossings, not a universal direction. If two people make drinks at once, test whether their hands, elbows and hot vessels conflict.
4. Verify power at the wall
Read the nameplate and manual for each appliance. Record rated voltage, watts or amperage, plug type, cord length and any instruction about a dedicated or grounded receptacle. Coffee brewers, kettles and espresso machines can be substantial heating loads. The apparent number of sockets does not establish that the circuit can support simultaneous use.
Plan for direct access to suitable permanent outlets as the manuals require. Do not daisy-chain power strips, run cords under rugs or furniture, pinch cords behind the machine, staple them in place, or remove a grounding prong. CPSC identifies damaged, undersized or otherwise noncompliant extension cords as shock and fire hazards. If the station depends on adapters, extension cords or an overloaded location, stop the layout and ask a qualified electrician what the permanent installation needs.
Keep cords and plug connections away from drips, steam, sink spray and hot surfaces. Do not route a cord across the preparation path where a hand, child or pet can pull the appliance down. An outlet inside an appliance garage does not by itself make it safe to operate a heating appliance with the door closed; follow the appliance and cabinet instructions.
5. Separate clean water, milk and waste
Measure the water-tank or kettle route from sink to station. A removable tank should clear the cabinet, faucet and appliance without tilting past its fill line. If the brewer is plumbed, use the manufacturer’s installation requirements and qualified trades; do not improvise supply or drain fittings from a countertop plan.
Give milk a short route back to the refrigerator. FDA cold-storage guidance sets refrigerators at 40°F or below and advises returning perishable food promptly. Do not create a permanent milk shelf at the coffee station. If several drinks are being made, pour only what the batch needs and clean the pitcher and steam wand according to the machine instructions.
Plan where spent grounds, filters and capsules go. A knock box or compost container needs a stable location that does not crowd the hot-drink landing. Confirm what the local waste program accepts; packaging marked compostable may still require a specific commercial facility.
6. Fit cleaning and maintenance into the same footprint
Daily cleaning parts may be larger than they look in the assembled machine. Measure the drip tray, brew basket, carafe, portafilter, milk pitcher, water tank and grounds bin against the sink opening, faucet sweep, drying rack and dishwasher guidance. A deep counter corner that hides the machine can also make a full drip tray hard to carry level.
List weekly and periodic jobs from the manuals: brushing the grinder, backflushing where specified, washing removable parts, changing a water filter and descaling with an approved product. Reserve a labeled storage place for the correct cleaning tools and consumables. Do not mix descaling chemicals, substitute an undocumented product or leave chemicals where they can be mistaken for drink ingredients.
Build a coffee-station fit record
Record the source beside every dimension. Product-page dimensions can differ from a current manual or revised model, and a marketplace listing may combine several variants. Save the exact model number, manual revision and measurement date before comparing equipment.
| Part | Record | Pass condition |
|---|---|---|
| Available bay | Minimum usable W × D × H; door and hinge paths | Working parts stay inside the supported, permitted envelope |
| Brewer closed | Maximum exterior W × D × H; filled weight | Counter or cart support and appliance instructions pass |
| Brewer operating | Open lid, tank, basket, lever, tray, wand and handle paths | Every task works without forcing or unsafe repositioning |
| Grinder | Closed size; hopper-fill and removal height; dose path | Beans, adjustment, dosing and cleaning remain accessible |
| Electrical | Nameplate load, plug, cord exit and reach; manual language | Suitable permanent outlet and circuit plan; no pinched cord |
| Preparation | Scale, tamping, filter and cup area | Stable working surface without crossing hot or wet zones |
| Water and milk | Fill route, tank weight, refrigerator distance | Short, controlled path with spills kept away from electricity |
| Cleaning | Tray and part dimensions; sink, drying and chemical storage | Parts can be emptied, washed, dried and replaced as directed |
| Service | Serial-label access, filter, burr and repair paths | Routine care does not require dismantling the station |
Use cardboard before comparison shopping
Cut a full-size footprint for the brewer and grinder. Tape upright profiles at their maximum operating height. Add marked arcs for doors, handles and a steam wand. Place the templates on the actual counter for several days. Rehearse filling, dosing, brewing, serving and cleaning with empty cups and cool water.
The exercise exposes hidden conflicts: a refrigerator door hits the user, a cabinet hinge occupies the grinder’s fill path, the trash pullout blocks the standing position, or the only outlet lies behind a water tank. Change the layout on paper before choosing equipment. More appliance features cannot repair a poor route.
Plan one calm daily workflow
Stage from dry to wet
Store beans, filters and the scale in the dry side of the station. Put the water-fill and milk path toward the sink or refrigerator. Keep a dedicated hot-drink landing clear of loose cords, paper packaging and the edge of the counter. Mugs should be reachable without leaning over a hot machine.
A basic filter-coffee sequence is: fill water, weigh and grind, load filter and grounds, brew, land and serve, discard grounds, rinse and dry. An espresso sequence adds warming, portafilter preparation, extraction, milk steaming, purging and tray care. Write the actual sequence for the selected machine; do not arrange the station around a staged product photo.
Use the manual for heat, steam and ventilation
Steam and heat can affect cabinet finishes and anything stored immediately above an appliance. The necessary clearance depends on the exact machine and cabinet system. Do not substitute a generic “two-inch gap” or assume that pulling the machine forward solves every ventilation requirement. If the manual is silent or unclear about enclosure use, ask the manufacturer before building the enclosure.
Keep towels, paper filters and packaging away from hot plates, boilers and steam outlets. Stay nearby while a heating appliance operates. Unplug as directed before cleaning, allow hot parts to cool, and never immerse an electrical base unless its instructions explicitly allow it.
Plan water quality from evidence, not accessories
The Specialty Coffee Association publishes home-brewer standards for brewing performance, including water-contact temperature and uniform extraction tests. Certification can help evaluate brewing performance, but it does not establish that a brewer fits your cabinet or that a particular water treatment is correct for the machine.
Water chemistry can affect taste and mineral buildup. Use the brewer manufacturer’s documented water and filter guidance. Before adding an under-sink filter, pitcher or softening system, verify what it changes, replacement intervals, compatible plumbing, capacity and whether the appliance warranty contains relevant requirements. Avoid health or performance claims that the filter maker does not substantiate.
The purchase rule
Buy only after the operating envelope passes
Compare complete systems: brewer + grinder + preparation + permanent power + water route + landing + cleaning + service. A smaller machine that can be filled and cleaned in place may be more useful than a higher-capacity machine that must be dragged out every morning.
Run the seven-day cardboard rehearsal
- Save exact manuals. Record model numbers, manual revisions, electrical ratings, clearance language and cleaning directions.
- Measure the bay. Mark minimum width, depth and height plus doors, hinges, outlets and cord paths.
- Build operating templates. Include open tanks, lids, hoppers, handles, trays and steam-wand arcs.
- Walk the sequence. Rehearse fill, grind, prepare, brew, land, serve, empty, rinse and dry.
- Test two users. Have each regular user reach controls and lift a simulated full tank without strain or conflict.
- Audit power and water. Confirm the plan does not depend on a pinched cord, adapter, improvised plumbing or wet plug area.
- Live with the footprint. Leave the templates in place for a week and note conflicts with meals, doors, cleanup and other appliances.
- Check service access. Find the serial label, filter, burr path, removable parts and manufacturer support route.
- Preserve return evidence. Save published dimensions, photographs, packaging requirements and current return terms before buying.
A listing standard for coffee equipment
Ultimate Kitchen Supply is a planning preview. Prices, checkout, inventory, branded listings and availability remain disabled until supplier authorization and accurate commercial terms are documented. The Coffee Prep Station brief defines a future evidence standard without implying that any product is available.
A publishable brewer listing should state exact model, maximum exterior dimensions, operating height and depth, filled weight, water-reservoir capacity and removal direction, brew capacity, cup clearance, cord length and exit, nameplate electrical rating, plug type, manufacturer clearances, included parts, compatible filters, cleaning and descaling directions, warranty source and repair path. A grinder listing should add hopper and grounds capacity, burr type, adjustment method, operating height, retention-cleaning access and documented replacement-part path.
Reject “fits any counter,” “commercial grade,” “barista quality,” “maintenance free” and similar claims unless the responsible maker defines and supports them. A certification must name the standard, model and current listing source. Reviews can reveal workflow questions, but they do not verify inventory, safety, compatibility or a seller’s authorization.
Frequently asked questions
How wide should a coffee station be?
Start with the exact brewer and grinder operating envelopes, then add stable preparation and landing space. There is no universal width because tank direction, hopper access, portafilter handles, user reach and drink workflow vary.
Can I keep the machine under an upper cabinet?
Only if the exact manual permits the location and every lid, tank, hopper, tray and hot or steamy operation has the required clearance. A closed machine fitting beneath the cabinet is not enough.
Can the brewer and grinder share a power strip?
Follow both appliance manuals and the electrical product rating. Do not use a strip or extension cord to compensate for inadequate permanent outlets or circuit capacity. A qualified electrician can assess the location.
What measurement is most often missed?
Operating height is a frequent miss: top-fill water tanks and grinder hoppers need space to open or lift out. Drip-tray removal, steam-wand sweep and cord exit are close behind. Record every moving part.
Sources
Reviewed October 27, 2026. Exact appliance manuals and local electrical requirements govern the installation.
- Specialty Coffee Association — Coffee Standards
- Specialty Coffee Association — Certified Home Brewers
- U.S. Consumer Product Safety Commission — Extension Cord Safety
- U.S. Consumer Product Safety Commission — Household Electrical Products
- U.S. Food and Drug Administration — Are You Storing Food Safely?
Public discussions were reviewed to identify recurring questions about top-fill clearance, shallow counters, steam-wand access, grinder placement, cart stability, outlets and sink distance. Fit and safety directions above rely on official standards, agency guidance and the exact product manuals rather than anecdotal claims.